Search This Blog

Monday, December 20, 2010

What's in a Game?


My personal shopper (husband) got a great deal on board games this year. They were $3 a piece at Toys R Us with a $2 rebate. So for a dollar I got a new supply of Candyland cards to use for gift tags. (interested? See my ETSY shop:http://www.etsy.com/shop/pjjunker). I like to use the game boards for clipboard and book covers, too. So with the tags as my inspiration, I found gift paper (Target) that I thought looked like the game and even used a couple of the boxes for gifts to tie together the whole look. And no, we don't have anyone named Lolly at our house. I make up a code every year to keep the snoopy kids guessing on which gift is theirs! Merry Christmas!


Friday, December 17, 2010

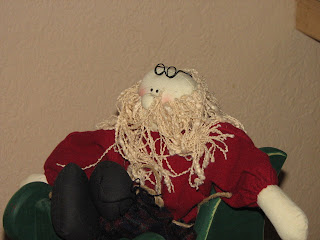
The Men in my Life!


These are the men in my life this holiday season. Quiet and plump but oh so cute!

Tuesday, December 14, 2010

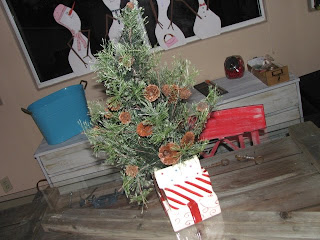
"O" Christmas Tree(s)


The Christmas trees
start at our front door with a tree full of baskets
filled with gifts and berries and adorable little signs.
Inside, I have Christmas trees in cookie jars (from a casino in Vegas)
and one in a bait bucket that I added some distressed letters to.
There are a couple trees in the entryway, too along with our traditional
tree.

Wednesday, November 24, 2010

Gobble till you Wobble!

Here's the turkey that I made this year. My sister has wooden pieces that she puts in a real pumpkin. I found the craft pumpkin on sale at Michaels for 70% off after Halloween. Then I drew the head and feather patterns, cut them, stuffed them and sewed them up. I used some "woodies" that I also bought at Michaels but kabob sticks work just as well to attach the pieces to the craft pumpkin. They are a bit wobbly so you may want to add a bit of glue to keep them in place. I also tied a bit of floss to the bottom of each piece for some extra detail. And yes, he does have a wobbler...just doesn't show in this picture for some reason!

Saturday, November 13, 2010

Just Add SNOW!


I got a request for a snowman kit on etsy. Since I couldn't post my pictures there, I decided to post them here. Isn't he adorable? The first pictures shows all the accessories in the bucket, the second one shows them off. It also has 2 big red heart buttons for his front.

Friday, September 10, 2010

Pottery Barn Cubbies gets Mate


My hubby bought me these awesome cubbies from Pottery Barn that fit perfectly on top of a desk that belonged to my grandparents. It wasn't an heirloom piece so I didn't have any problem painting it to match. For the pull down part, I modgepodged pages from an old McGuffy reader. It was in such sad shape that it wasn't even good for display. I also added some pages to the cubbies to tie the whole thing together. I wanted something different for a handle, so I used bulldog clips for the pull down handle and the small drawers.

Thursday, August 26, 2010

Letter perfect


I put this together one weekend with things that I already had. The letters are leftovers from the chair project, (pictures coming soon)the canvas was part of another project that I loved but didn't have a space for and the picture frame was an old one that I painted black. Originally, I had planned on painting everything outside the frame in black, but I changed my mind once I had it laid out. I put it for sale on my etsy account, but I'm not sure I want to part with it!!!

Saturday, August 21, 2010

All set up and ready to sell at the performances of CATS! I love using the black ladders for setting up. They are fast and easy and let me display things at different levels.

Wednesday, August 11, 2010

a present for my "womb mate" (twin)


The idea for this gift began with the shirt. My sister (and I) love the Life is Good shirts. I picked out this one for her but it didn't seem like quite enough so I decided to make it part of an icecream package. I bought cherries, cookies, and fudge. Then I found a round box to put it all in. To cover the top edge, I cut a 2" strip of paper and folded it in half. Then I cut slits all the way around so it would bend. Then I added the other strips of triangular paper and scrap book letters. The other things were pretty straight forward. The glue that I used is called Crafters Pick. It's the best that I've found for this kind of project.
I got the graphic for the card off of the "From my Kitchen" cartridge on my Cricut. The inside of the card says "SWEET"
The other day I saw some Modge Podge that said "Paper" on it. It was different than what I've seen before. Has anyone tried it? I've always had problems with modge podge wrinkling and bubbling and I'm wondering if this one is any better.

Monday, August 2, 2010

baby elephant


Instead of wrapping up these baby gifts, I simply covered a can (mine was from formula) with scrapbooking paper. Punched a hole and made it look like it was tied on with a button. The scalloped piece that you can see on the side was made by tracing a water bottle cap.

Wednesday, July 28, 2010


My son Patrick is in the musical Cats this summer. As a fundraiser, I volunteered to make some "cat" crafts to sell at the performances. I had the most fun making these "cat" food cans. I started with a can of pineapple. I opened it on the bottom leaving the tab in tact. I used my scrapbooking stuff to decorate the can. The last step is to fill the can with goldfish crackers. The website where I found the idea said that they just glued it back in place. I haven't tried it yet, I hope they are right!

Tuesday, July 27, 2010

Soccer thank yous


The end of a soccer season brought me to making thank-you cards for the coaches. These were simple and could be used a variety of ways. I started with a 4x12" piece of blue card stock. I folded in in half with the fold at the bottom to create a pocket. But before I glued it, I laid a 1x12" piece of cardstock (blue) next to the fold so that I had 4" showing on each side. Then I folded up the pocket and glued the sides. On one of the strips that extended from the side I glued grass that I had cut free hand and on the other side I created a soccer ball. By folding the ball side first, it looks like the ball is sitting the grass. The pockets are perfect for a gift card, note to the coach or a favorite photo. I lightly traced around the soccer ball onto the pocket, so I could add a note that wouldn't show when the card was closed.

Saturday, July 17, 2010

Bedroom update!


We are very seldom in a house long enough for me to do a room a second time, so it was very strange re-doing Patrick's room this summer. He's had the logs around the window and trees painted on the walls for at least 7 years. And since he'll be in high school soon, it was really time. The headboard is a $20 rug from Target and the bedding is from Walmart. I had the chest of drawers for a while and they were bigger than what he had, so I used those and the nightstand for my starting off point. Along the top of the wall where the white paint and gray meet, I used metal plumbers tape and roofing nails for a border. Now, if he wants to hang anything, he can just use magnets!! The drawers are chalkboard paint, not that he'll use that to organize but I can always hope!

Sunday, June 27, 2010

50's gaming table


While junking in Vegas...only me...right?  I found this 50's game table.  It has presidents up to Truman and spaces that I think once had cars to move around.  It also has the multiplication tables.  I certainly don't need another table but it was just too cool to resist so I brought it home and took off the hinges.  Now it's a magnetic board!

Sunday, June 13, 2010

Cricut stencils


I made this apron for my beautiful daughter, Bri who is working as a cook at a camp this summer. My family has a passion for word plays, so they were a must for this project.  

I started by cutting shapes  from the kitchen cartridge.  Then I laid wax paper over the shapes I was not using and sponged paint into the area I wanted.  You can see that I goofed and went outside the line.  Luckily for me, I was able to rub it off.  I used plain old craft paint.  You know it doesn't wash out of clothes, if you ever gotten any on you!  (I've also painted rugs successfully.) Finally, I outlined the shapes with a black paint marker and added the words with a white paint marker.  She loved it and so do I!